Getting Started with Uberchord – A Guide for Beginners
In this guide you will learn how to tune your guitar & read chord charts
The Blank Chord Chart
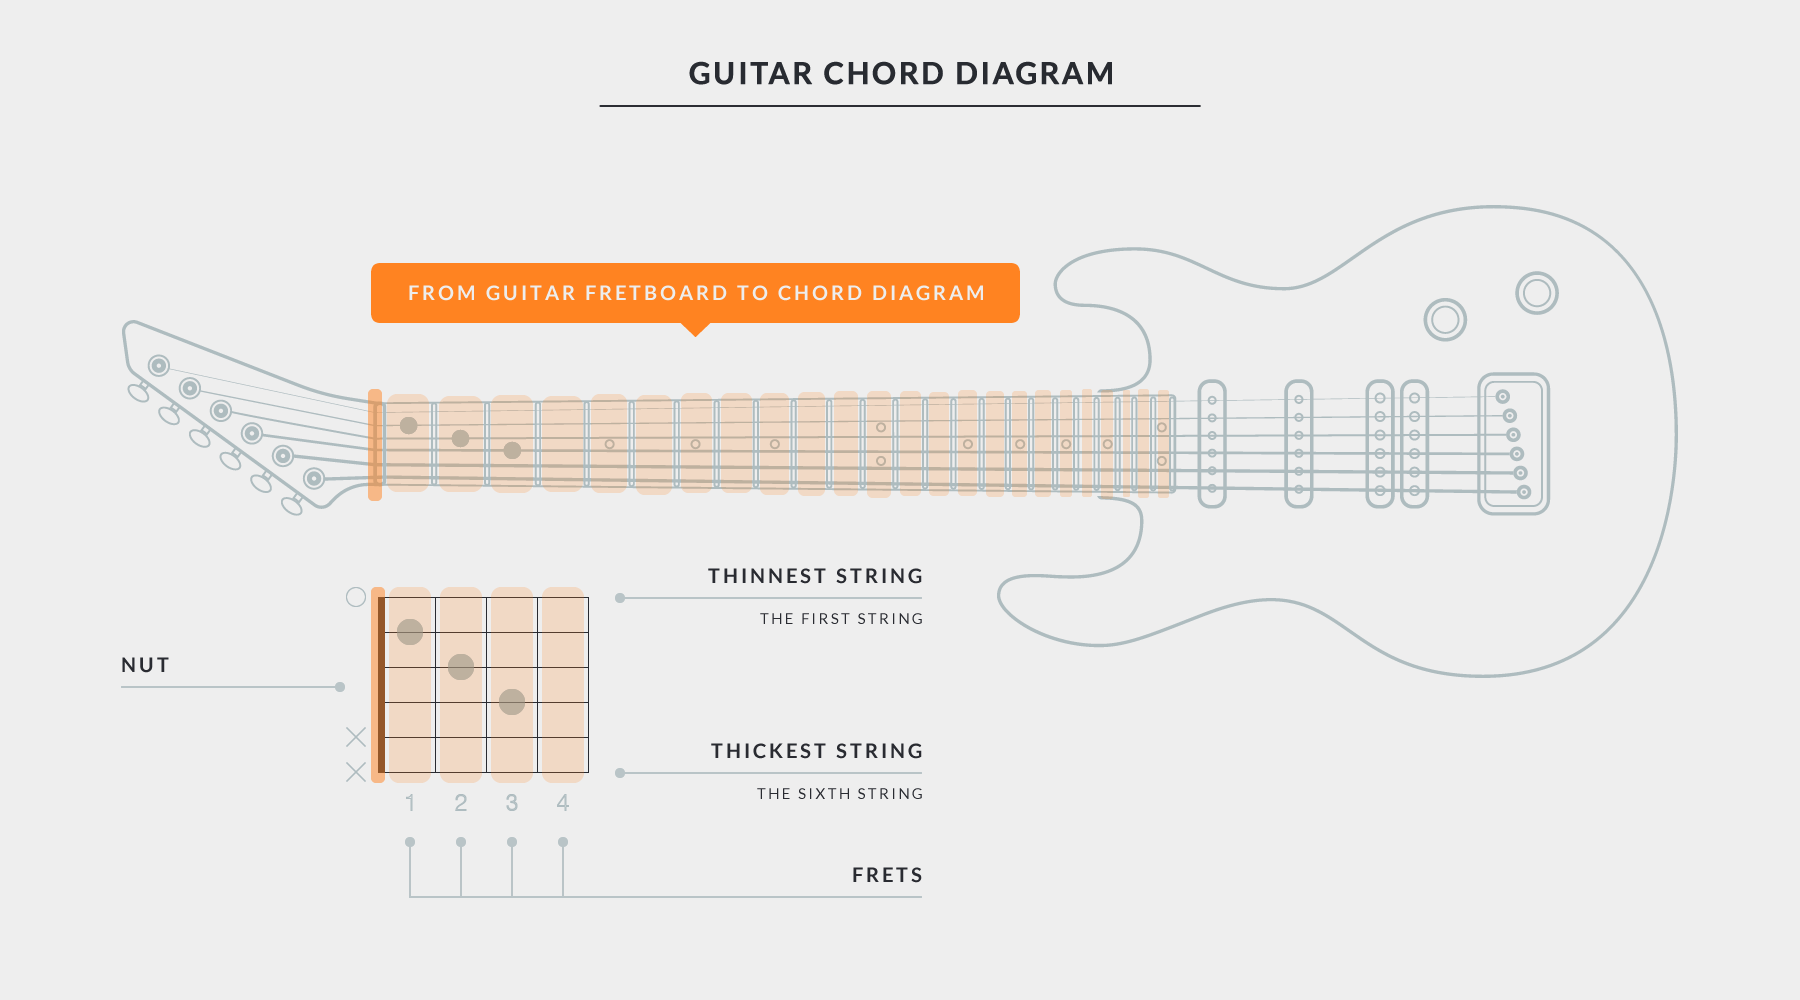
Before we put anything on a chord chart you need to know the orientation of the display in relation to your guitar strings and fret board. Imagine laying your guitar flat on the table with the tuning machine-heads to your left and looking down on the fret board. This is the orientation of Uberchord’s chord charts.
Tuning Your Guitar
Standard tuning for a guitar from low to high strings is E A D G B E. Remember that when we’re talking about music and notes it’s always referring to the tone. So the low E sixth string is the fat, wound one with the low sound, not the very thin E first string with a high tone that’s physically at the lowest position on your guitar. Take a few minutes to learn that the low E is called the sixth string, the A is the fifth, etc.
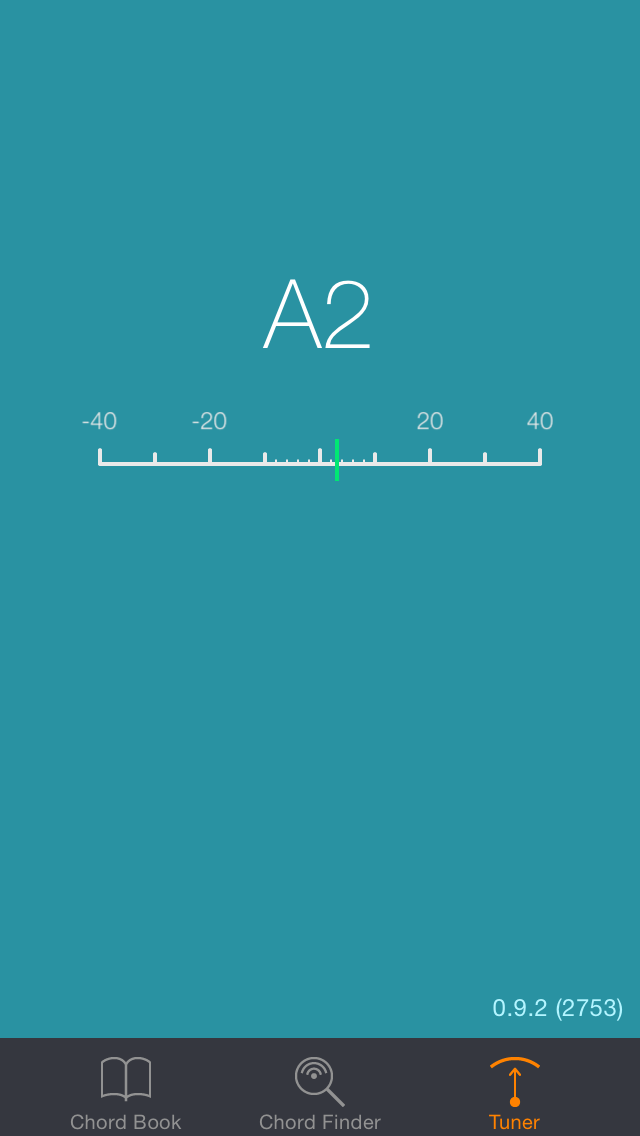
To tune your guitar, access Uberchord’s Tuner and make sure your iOS device is nice and close so the microphone will pick up your strings. With our Tuner you do not need to select the string you’re tuning — it will automatically figure it out. For the sake of simplicity, let’s start with the thickest string, the low E. Start with the low E string and pluck it once with your right, picking hand (assuming you’re right-handed) while muting all the other strings with your left hand. Watch the screen carefully for a result. It should show an “E” with the needle being to the left (flat) or right (sharp) of the center — the middle being where you really want it to be. Adjust the tuning machine-head slowly until the needle stays close to the centre. It will always waver and jump about a little bit, but as long as it’s on average hovering around close to the centre you’re in tune. It’s best to start with your string slightly flat and tune up to the correct pitch rather than be loosening the string and tuning down.
After that, do the same with the fifth A string, then the fourth D, the third G… and so on. Don’t forget to pluck only the string you want to tune and the others are kept silent. If your strings are new and “stretching” or your guitar tuning was a long way to start with, you’ll probably have to repeat the process again. Once you’ve achieved proper tuning a quality instrument will stay close.
Now that you’re in tune, it’s time to understand chord charts.
How to Read Chord Charts
Check out the F major 7th chord being displayed below.
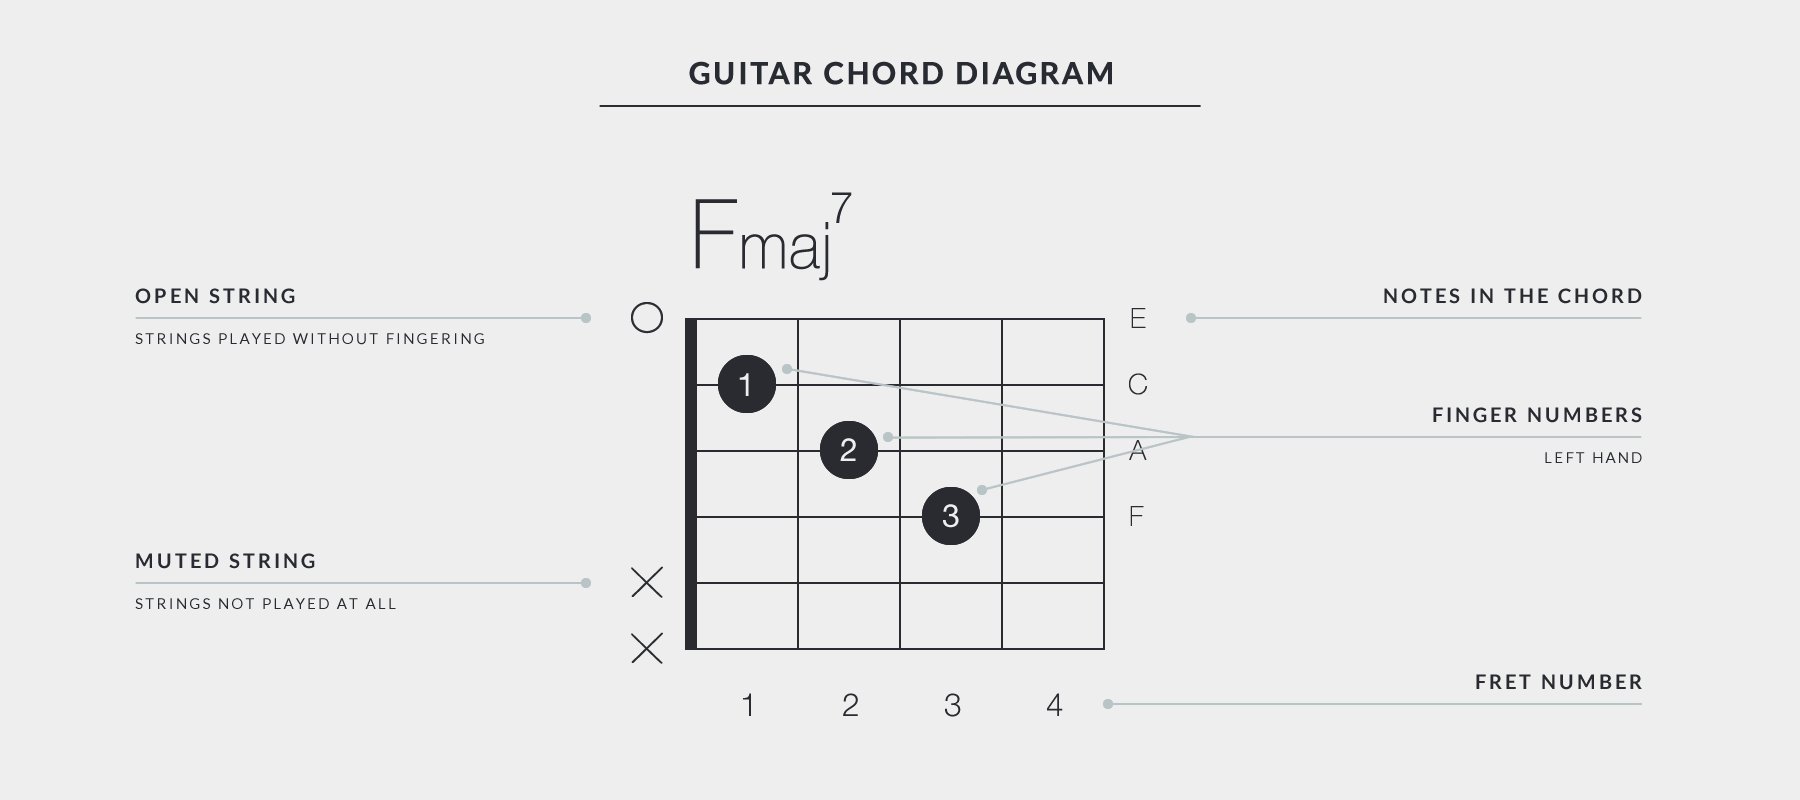
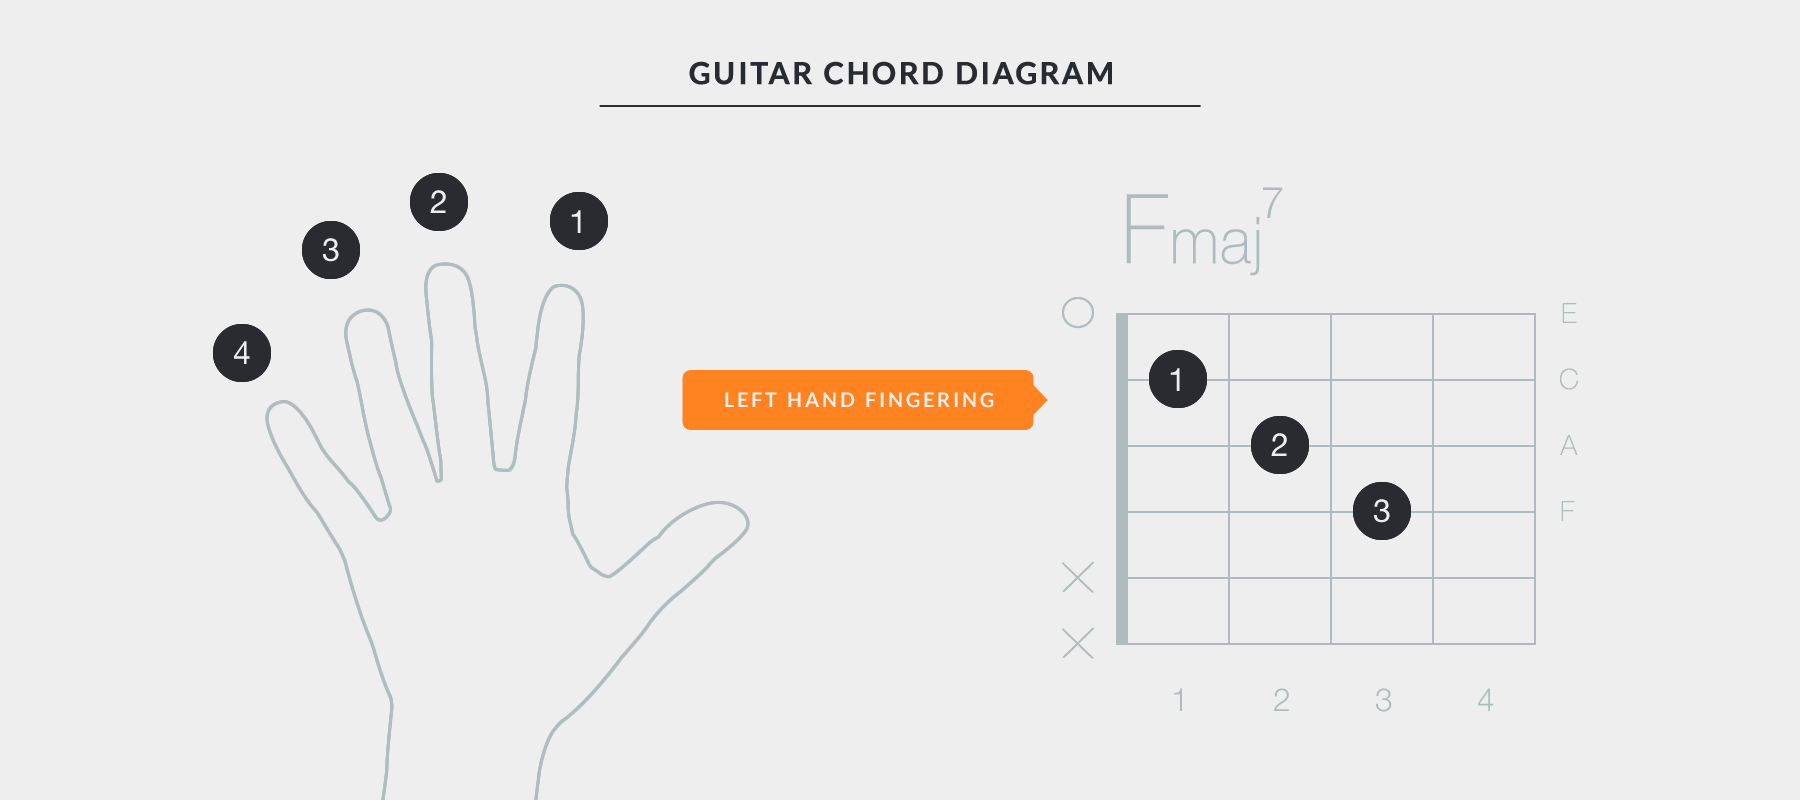
Remember the orientation of the chart as we discussed earlier. So here’s what you’re looking at with the F major 7th — the small round circle with the numbers inside are the fret board notes you need to play to create the chord. The number represents which finger to use and doing this correctly is very important for learning good technique. Your index finger is “1”, your middle finger “2”, the ring finger “3” and your smallest finger “4”.
Below the chord chart in grey is the fret number, in this case 1 through to 4, because the chart is showing the first four frets of your guitar. On more advanced chords you might be playing much further up the neck, so keep an eye on these numbers. You might play the chord in the wrong fret position.
Now see the open grey circle to the left of the virtual nut and beside the high “E” string? This means the open string (with no fretting) should be played to create the true chord sound. The musical note of that string is included in the chord.
You’ve probably worked this out for yourself now — the two “X” beside the E and A strings means those strings should not be played to make the chord sound. For beginners this isn’t so easy. With practise and for a chord like the F major 7th you’ll soon get the hang of it. On some chords those “X” strings are in the middle and seem impossible to not play. Don’t stress about this too much, because you’ll learn different strumming and picking techniques that can let you do this. The important thing to understand is that, as far as the chord chart is concerned, those “X” marked strings with their open string tones are not really part of the chord’s true structure and shouldn’t be played. But at this stage of your playing career, it’s okay to fudge things a bit.
Two other indicators you might see. First, a transparent fret marker and finger number means an optional note you can play to make the chord sound more full, but you don’t have to. Also, some charts will put a small “R” next to the string that plays the “root” note of the chord.
Getting Started In 3 Easy Steps!
1. Tune your guitar using Uberchord’s built in tuner
2. Figure out the correct orientation of the chord charts. Don’t accidentally try playing chords upside-down!
3. The circles on the virtual fretboard show you the right fingering position, while the number tells you which finger to use.
Looking for a good first lesson?
One of the most popular lessons on YouTube for first time guitar players is by Martyzsongs. You’ll be in good hands.
ARVE error: Mode: lazyload not available (ARVE Pro not active?), switching to normal mode

