

How to Tune a Guitar By Ear: Easy Step By Step Guide – Free Mobile Tuner
Author: Lucas Frost

While you are learning to play guitar chords tuning is essential. And unless you have a “robot” guitar which tunes itself, you will need to know some of the fundamentals….so here goes:
Table of Contents
Some Basic Principles
You can tune a guitar using a free tuner, such as the one which comes along with the Uberchord app, or Fender‘s online guitar tuner or by using your own ears to decide whether each string is hitting the right frequency.
I’ll focus more on the latter approach, mainly because it needs more explanations.
Tuning a Guitar by the ear helps to “train” your ear and improve your overall musicianship.
Relative Tuning – If you are playing alone, it only really matters that all strings are in tune with each other.
Absolute Tuning – When you play with someone else, it’s best to use a pre-defined pitch as a reference.
Unless you have perfect pitch, you will need a reference note to compare and tune each string to; this can be either an online tuner which plays a specific note; another instrument (for instance a B-note on a piano to tune the B-string); or another string on the guitar which has already been tuned.
The tuning methods described here work for standard tuning (EADGBe).
5th fret method
How it’s done
 I like to start with the sixth string:
The low E (let’s assume for now you have already tuned this string).
– Play the note on the 5th fret – this is an A, your reference note for the adjacent fifth string.
– Now play the open fifth string. The aim, of course, is to make this second note match the first one.
– Once the fifth string is in tune, you basically repeat the process: play the 5th fret on the A-string (D), which is your reference note for the fourth string. You can use this process for all strings EXCEPT when you tune the B-string: this time, play the 4th fret of the third (G) string.
Recap:
Every string has its corresponding reference note on the 5th fret of the string below* – except for the B-string, in which case it’s the 4th fret.
There are a couple of things to remember:
1 – Always tune up – from a lower pitch to a higher pitch. When you tune down, the string snags at the nut and will detune again as soon as you play it.
2 – Sometimes it’s difficult to tell whether you should tune a string up or down – Personally, I like to sing the notes: first the reference note and then the one you are adjusting. This generally helps.
3 – You can also go the other way, i.e. start with the higher strings (high E) – But this is slightly awkward because when you move your left hand to adjust the tuning peg, you take your finger off the note you are trying to tune and can’t hear the adjustment. This is where harmonic tuning is great.
Harmonics method
It’s based on the principle that the harmonic at the 5th fret should be the same as the harmonic at the 7th fret on the string above. Again, the exception is with the B-string.
How it’s done
 Start with the sixth string, the low E.
– Play the harmonic at the 5th fret by lightly holding your index finger on the string over the 5th fret – it should sound clear and bell-like.
– Now play the harmonic at the 7th fret on the A-string – the two notes should be the same, so adjust accordingly.
– This method won’t work to tune the B-string, so you need to tune it as described above (4th fret).
Advantages
1 – Harmonics are a wonderful thing – They are “cleaner” and involve fewer overtones; the purity of their sound makes it easier to notice how far the notes are off.
2 – Both strings will continue to ring even when you take your fingers off the string and adjust the tuning peg. Using this technique you can hear one note change pitch as it approaches the other.
3 – An interesting phenomenon occurs here, called phasing: when you adjust the string and one harmonic changes, it creates a “wobble” effect. You can hear it quite clearly and even feel it through the neck. When it stops wobbling the notes are in tune.
Electric tuners
While I always advocate acoustic tuning for the musicality it helps to train, electric tuners are really important for all guitarists, beginners and pros alike. Mainly for live settings where you can’t hear the notes, band practice where you need to be quick, recording situations where you have to be spot on, or when you are just getting started. There are at three basic types:

– Apps: such as the Uberchord app, use the phone’s inbuilt microphone to sample sound vibrations in the air and translate these into a note on the screen. You just have to tune up or down.
–  Plug-in: mostly found in the stomp-box format, these tend to come at the start of your effects loop. They analyse your signal’s frequency directly, indicating on the screen which note the string is on, and if you are too high or too low.
– Clip-on: small and convenient, these clip on to your headstock and “feel” the vibrations from the strings travel along the neck. Little lights indicate how far off your pitch you are and tell you when each string is tuned.
When Beethoven – the composer genius became deaf, he would bite on his piano to use his “inner ear”, which sensed vibration inside his head rather than from the air.
Some tips & tricks I bet no one told you!
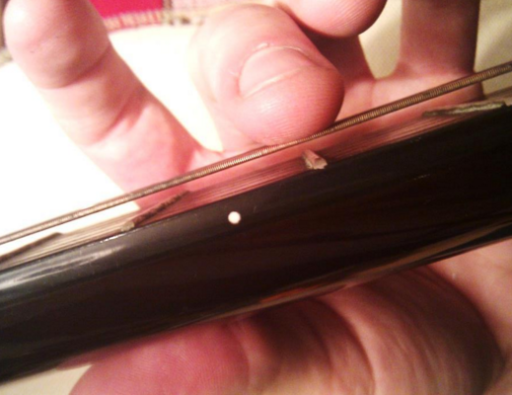
– When it’s too loud around you, you can bite into your guitar:
This is where it’s really handy to have an electric tuner, but there is another trick which was actually used by Beethoven. When the composer genius became deaf, he could still use his “inner ear”, which senses vibration inside your head rather than from the air. So he would “bite” his piano, where the sound vibrations would travel up through the wood, into his teeth and skull… finally he could hear his compositions. By the same principle, you can bite into your guitar (or just hold your teeth against the body).
– Tuning with a tremolo:
This can be a frustrating experience, because every time you get a string right, it will have changed the overall tension pulling on the tremolo springs – this in turn detunes all the other strings that you have just tuned to perfection, and you will have to go over all of them again. While there is no silver bullet for this, it really helps if you do two things: 1) tune the strings a little too high the first time round, as they will moderate downwards when you tune the other ones. And 2) start with the middle strings, the G and D. No idea why, but it helps!


As a guitar artist one must have a strong ear, else he/she can’t able to tune perfectly. The tips & the videos are so informational. As there are several types of free mobile tuner apps, use that after checking the reviews as well. I think a proper guidance is needed to all of the guitar artist. So have the proper keynotes & use the guitar tuner buttons & strings in a proper way. Enjoy the music & keep playing the guitar.